Inconsistent grayscale display on medical monitors risks diagnostic errors. A doctor’s interpretation of a scan should not depend on which screen they are using. DICOM Part 14 solves this.
DICOM Part 14 defines the Grayscale Standard Display Function (GSDF), a reference relationship for grayscale presentation. Applying it requires measurement and verification within the selected operating conditions; it does not alone establish diagnostic suitability or guarantee a clinical result.
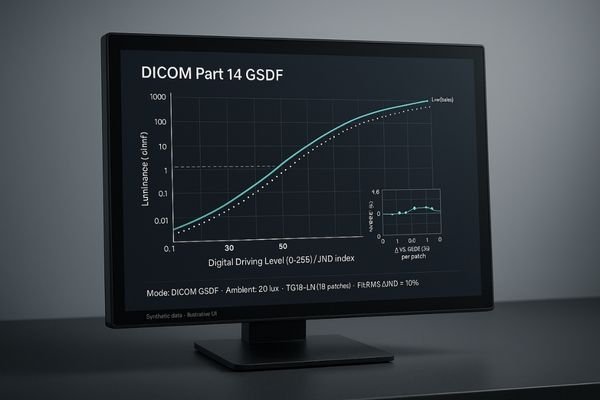
What you’ll get in this guide: What DICOM Part 14 is → Why it’s mandatory → How GSDF protects subtle findings → How to keep monitors compliant day-to-day.
What Is DICOM Part 14?
Different display responses and viewing conditions can change grayscale presentation. The evaluation should therefore record the display configuration and the conditions under which grayscale response is measured.
The DICOM PS3.14 standard describes a standardized grayscale display function. Use the current standard together with the applicable display-QA guidance; matching a response curve does not make every screen or reading environment equivalent.
Why Diagnostic Monitors Must Comply with DICOM Part 14
A radiologist’s diagnosis depends on trust in the display. If a monitor darkens subtle shadows or washes out faint details, life-altering pathologies could be missed or misread.
GSDF verification is one part of display QA. It should be combined with the intended-use review, operating luminance, ambient conditions, uniformity checks and continuing quality-control records. Do not treat it as a guarantee against missed findings or false positives.
How GSDF Protects Subtle Findings
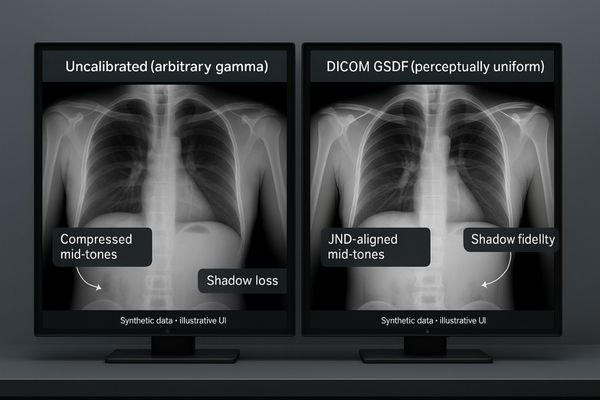
An uncalibrated monitor often compresses mid-tones or lets dark regions collapse into uniform black—exactly where micro-calcifications, faint fractures, vessel edges, or ground-glass opacities live.
DICOM calibration5 spreads tonal information where the eye needs it most. Key benefits:
- Perceptual uniformity6: Each step is a JND—subtle changes stay visible.
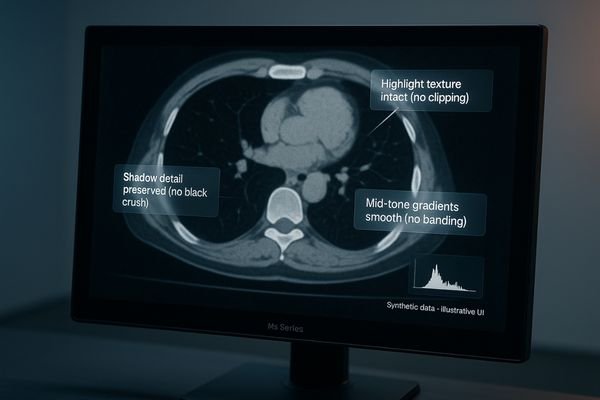
- Shadow fidelity: Near-black retains structure (no “black crush”).
- Mid-tone neutrality: Tissue gradients don’t jump or band.
- Highlight control: Bright regions don’t blow out diagnostically relevant detail.
- Panel discipline: Manufacturers employ 10/12-bit pipelines, uniform backlights, and tighter tolerances to hit the GSDF.
Key compliance metrics (add to your QC sheet):
| Measurement | Basis to record | Result fields |
|---|---|---|
| Grayscale response | Standard / QA method, target, instrument and test levels | Measured response, deviation and decision |
| Operating luminance | Approved target, black level and ambient contribution | Measured values and acceptance criterion |
| Uniformity | Positions, geometry and permitted variation | Position readings and calculation |
| Stability | Warm-up condition and repeated measurement interval | Time series and deviation |
| Reproducibility | Model, revision, settings and room condition | Repeat results, reviewer and date |
Keeping Compliance: From Factory to Daily QC
DICOM compliance is not a one-time event. Components age; sensors drift; rooms change.
Make compliance durable with a layered program:
- Acceptance & Baseline: Verify GSDF fit, Lmin/Lmax, uniformity, stabilization time; capture a baseline report.
- Scheduled constancy: Annual physics QA; quarterly/monthly checks; quick daily observations (pattern spot-checks before lists).
- Closed-loop stabilization: Use displays with real-time brightness stabilization so luminance doesn’t wander between checks.
- Ambient discipline: Keep reading rooms within controlled lux; reduce reflections; use ALC-capable monitors to adapt safely.
- Audit trail: Store QC logs, test results, and calibration history for accreditation and risk management.
Execution path—GSDF in four steps:
1) Measure the monitor’s native luminance response.
2) Fit to GSDF and compute the correction LUT.
3) Apply LUT and re-measure to verify fit, Lmin/Lmax, uniformity.
4) Document, schedule constancy checks, and lock profiles.
Common myths (and quick reality checks)
- “Factory calibration is enough.” It drifts. Constancy checks keep you safe.
- “Higher nits fix everything.” Without GSDF and uniformity, extra nits just wash detail.
- “Office monitors + colorimeter = diagnostic.” Lacking stabilization, ambient handling, compliance workflows.
- “We never change room lights.” People do. Doors open. ALC and policies keep GSDF valid.
Environment & room conditions (practical notes)
Keep lux low and stable; control reflections with matte treatments and layout; avoid bright sources behind the viewer. ALC features help, but good room discipline comes first.
DICOM-Compliant vs Non-Compliant (at a glance)
| Claim to verify | Evidence required |
|---|---|
| GSDF calibration | Measured response and applicable verification method |
| Brightness stabilization | Model-specific feature description and test results |
| Ambient compensation | Sensor availability, operating limits and room policy |
| Uniformity correction | Supported mode and measured uniformity |
| Quality control | Acceptance and constancy procedures with retained results |
Ensuring and Maintaining DICOM Part 14 Compliance
DICOM compliance will drift over time due to component aging and use, risking a slow degradation of image quality that can go unnoticed.
Compliance is maintained through regular QA and calibration. Modern diagnostic monitors use built-in sensors and software to automate this process without disrupting workflow.
| Feature for Maintaining Compliance | Function |
|---|---|
| Built-in front/dual sensors | Measure luminance and perform self-calibration against GSDF |
| Luminance stabilization | Locks brightness to target from warm-up through long reading sessions |
| Ambient Light Compensation (ALC) | Adjusts display behavior in response to room-light changes |
| QA / DICOM-QC suite | Runs TG18-style tests, verifies GSDF fit, logs reports for audits |
| Profile lockout | Prevents accidental setting changes that break compliance |
Recommended DICOM-Ready Displays (Reshin)
These links are a shortlist for document review. Features must be confirmed for the selected model and revision; no universal feature checkmarks or clinical approval are inferred.
| Model | Documents to verify |
|---|---|
| MD33G | Request the current specification, calibration method, sensor / software requirements, operating-luminance data and intended-use documentation. |
| MD32C | Request the current specification, calibration method, sensor / software requirements, operating-luminance data and intended-use documentation. |
| MD46C | Request the current specification, calibration method, sensor / software requirements, operating-luminance data and intended-use documentation. |
| MD45C | Request the current specification, calibration method, sensor / software requirements, operating-luminance data and intended-use documentation. |
| MD52G | Request the current specification, calibration method, sensor / software requirements, operating-luminance data and intended-use documentation. |
| MD26GA | Request the current specification, calibration method, sensor / software requirements, operating-luminance data and intended-use documentation. |
| MD22CA | Request the current specification, calibration method, sensor / software requirements, operating-luminance data and intended-use documentation. |
| MD85CA | Request the current specification, calibration method, sensor / software requirements, operating-luminance data and intended-use documentation. |
| MD120C | Request the current specification, calibration method, sensor / software requirements, operating-luminance data and intended-use documentation. |
Selection tips:
Grayscale-heavy (DR/CT/MRI): MD33G / MD26GA / MD52G
Color + grayscale on one screen: MD32C / MD46C / MD45C
Multimodality, dense layouts: MD85CA / MD120C
Conclusion
DICOM Part 14 provides a reference for grayscale presentation. Select an appropriate display and QA program for the intended role, document the measured response and maintain the approved configuration. For a supplier review, use diagnostic display supplier evaluation.
👉 For expert support and Reshin’s DICOM-compliant diagnostic display solutions, contact martin@reshinmonitors.com.
-
Referenced link: DICOM calibration (pmc.ncbi.nlm.nih.gov). ↩
-
Referenced link: Perceptual uniformity (medium.com). ↩